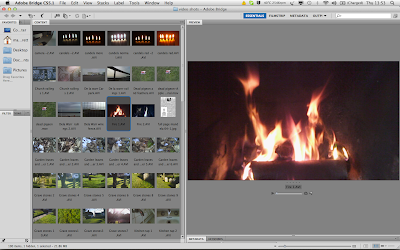
Once I started this project it became very apparent that my work flow had to be more organised. The camera that I was using would auto label the clips Sunp0001.avi changing the number for the next clip. After down loading to a folder and deleting from the memory card it would return to Sunp0001.avi. So I gave every clip a new name using Adobe Bridge This allowed me to view on in larger format than the thumbnails in the folder on my mac and I did not have to open them in QuickTime if I wanted to see them larger. I cold also delete the ones I was clearly not going to use.
 |
| Renaming and sorting clips in Bridge |
In our tutorials in the class we were advised to convert the files using compressor to Apple Pro Ress 442
this would give a smother result when being edited in Final Cut Pro. During the editing process I used Final Cut Pro X having never used editing software before I found FCP X easyer to use than FCP 7.
At the very start of project I had edited the speech in Sound Track Pro, I kept all of my sound clips in a separate folder, it also included the music and the cut out section of music I used in my clip. Lastly I kept the original still images in another folder. The speech I had saved as a word document so I could copy and paste word and sentences when I used Motion to add the text to my final edit.
 |
| Time lines from FCP X |
One of the most helpful things in FCP X was the facility to copy and save different versions of the time line allowing me to return to a previous edit if I was not happy with the direction I had take in the choice of clips and effects. The same could be said for Motion 5 I could import the new clip and hide the old clip and use the text movements I had already created.


No comments:
Post a Comment